Updated August 2024
Quarto is an open-source scientific and technical publishing system. It enables you to write plain text (.qmd) source files and render them into consumable (e.g., html, pdf) output files. This tutorial walks you through the steps to create a website with Quarto. This information is also available on the excellent Quarto website and in several other tutorials. A subsequent post (this one) demonstrates how to freely host your website on GitHub. Additionally, in December 2024, Posit posted a four-part video series detailing elements of Quarto websites on YouTube here.
One main purpose for creating a website with Quarto is the ability to add “blog” posts written as Quarto documents. These documents can contain code (e.g., R, Python, C++, Julia, other) which – as part of the rendering process – will run the code and embed the code’s output (e.g., numeric results or plots) in the rendered html output file. As a result, a publication-ready blog post can be written as one Quarto source file and no copy/paste is necessary to include code or the code’s resulting numeric or graphic output.
So, let’s go make that website.
Step 1: Get Quarto
Quarto comes bundled with RStudio (v2022.07.1 and later). Therefore, if you are using RStudio, you should already have Quarto installed. You can check your version of RStudio by going to RStudio’s Help menu and selecting “About RStudio.”
If you prefer VS Code, the command line, or another IDE, you can download and install Quarto from quarto.org. VS Code users should also install the Quarto VS Code Extension.
You can confirm that Quarto is installed by running quarto --version at the command line in the Terminal (on Mac or Linux) or in the Git-Bash terminal on Windows – note that this is not the R console. If a version number is returned, you’re good to go.
Terminal
quarto --versionStep 2: Create a Website Project
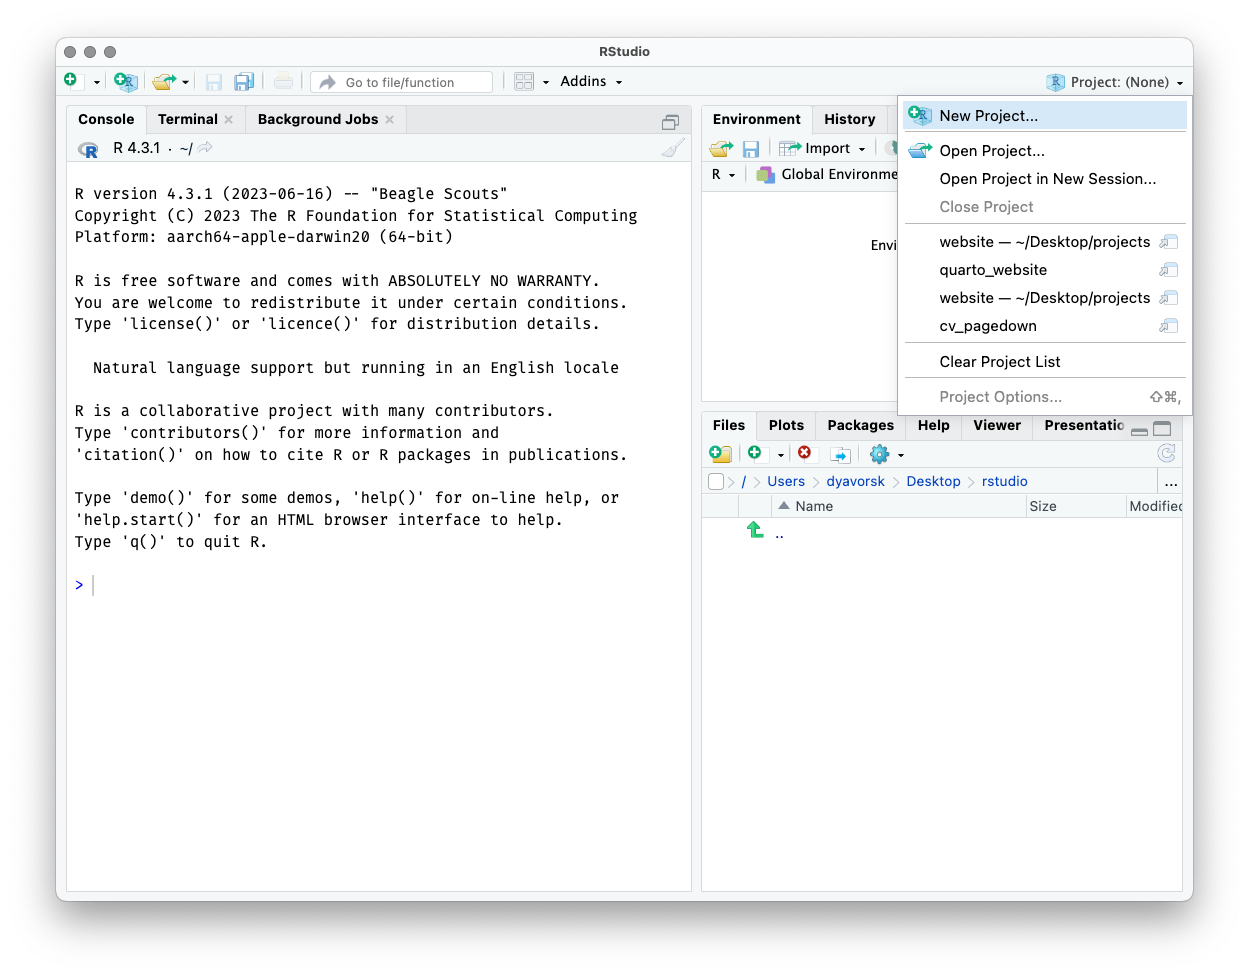
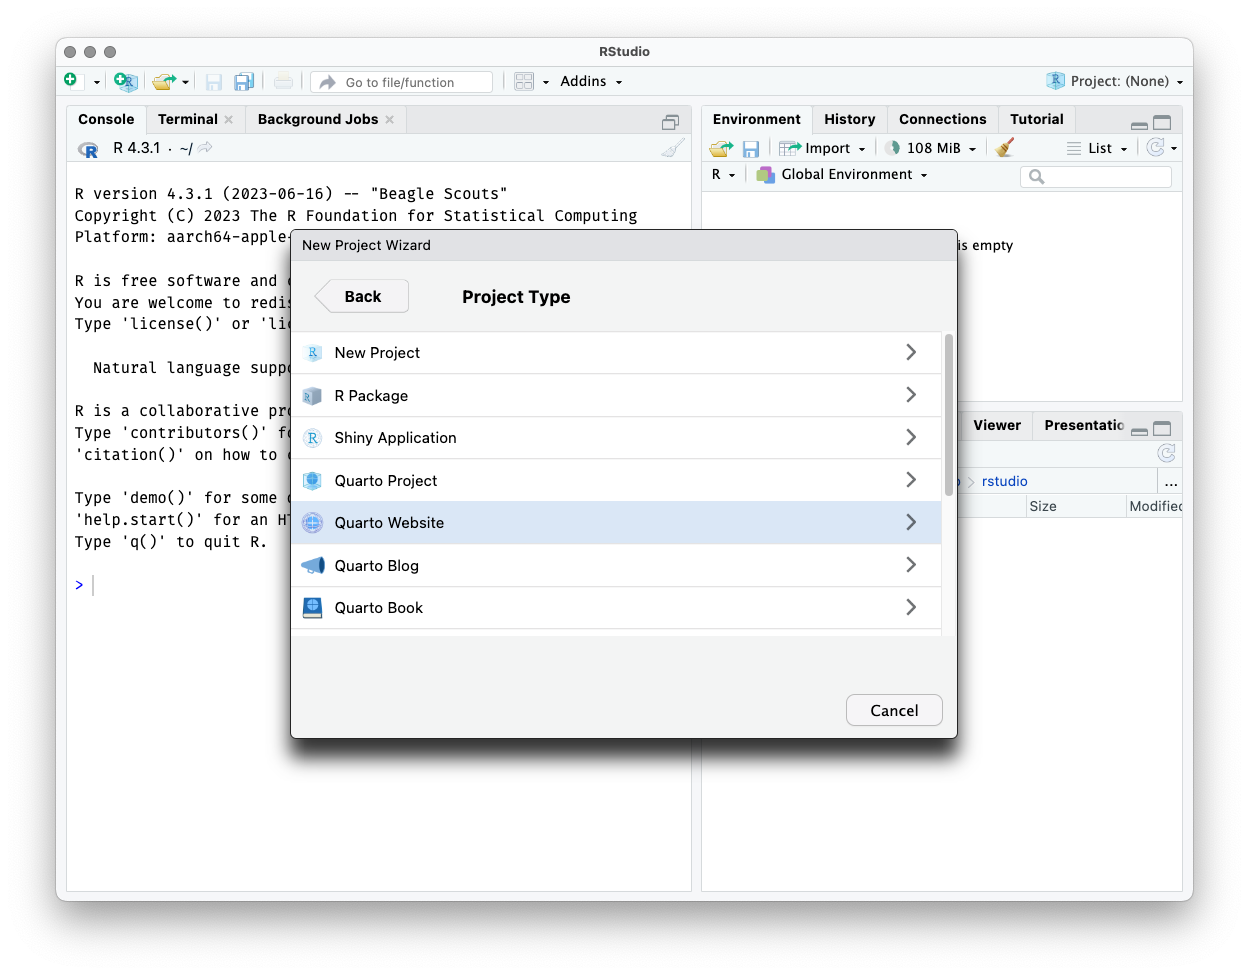
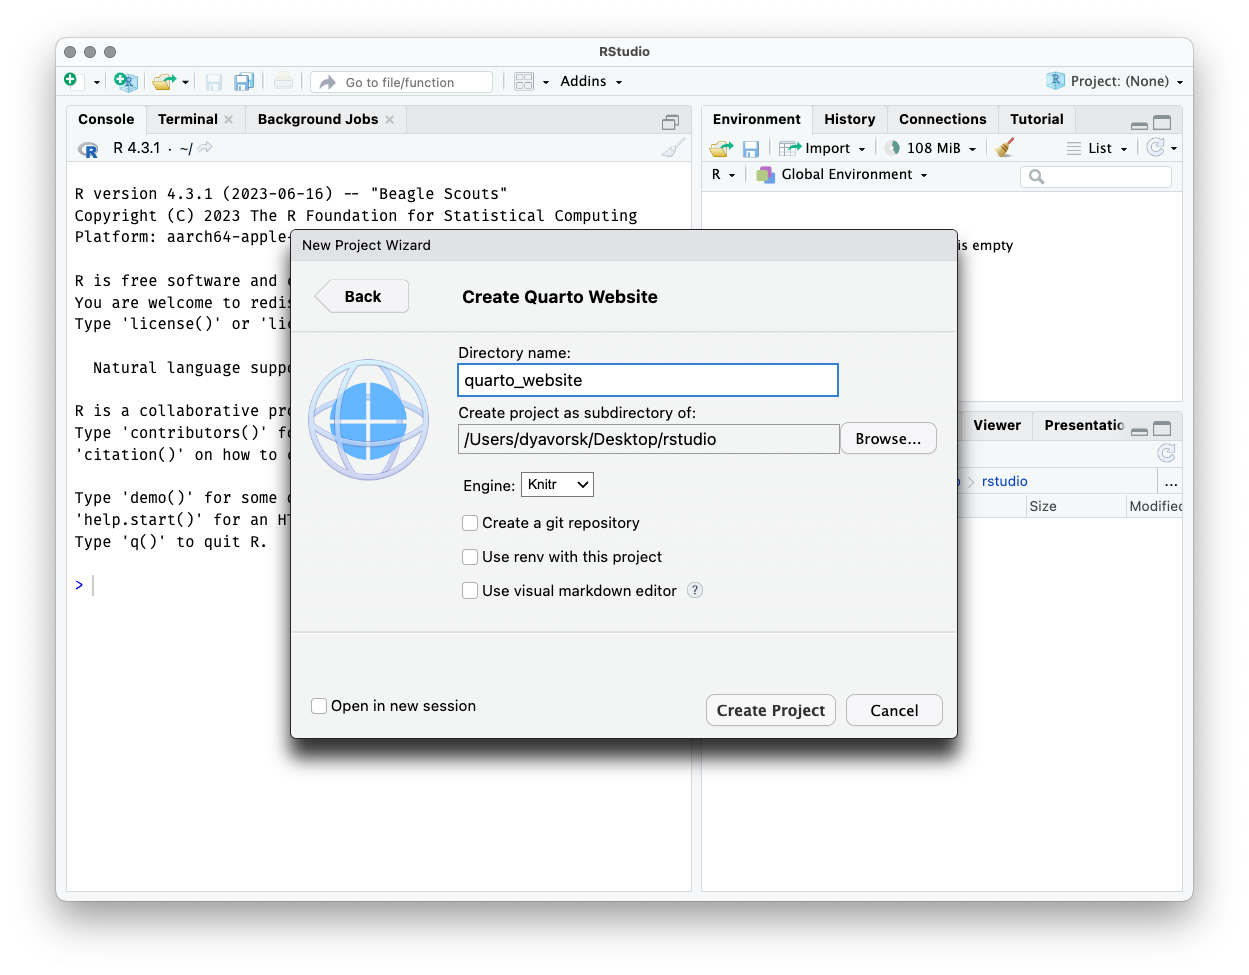
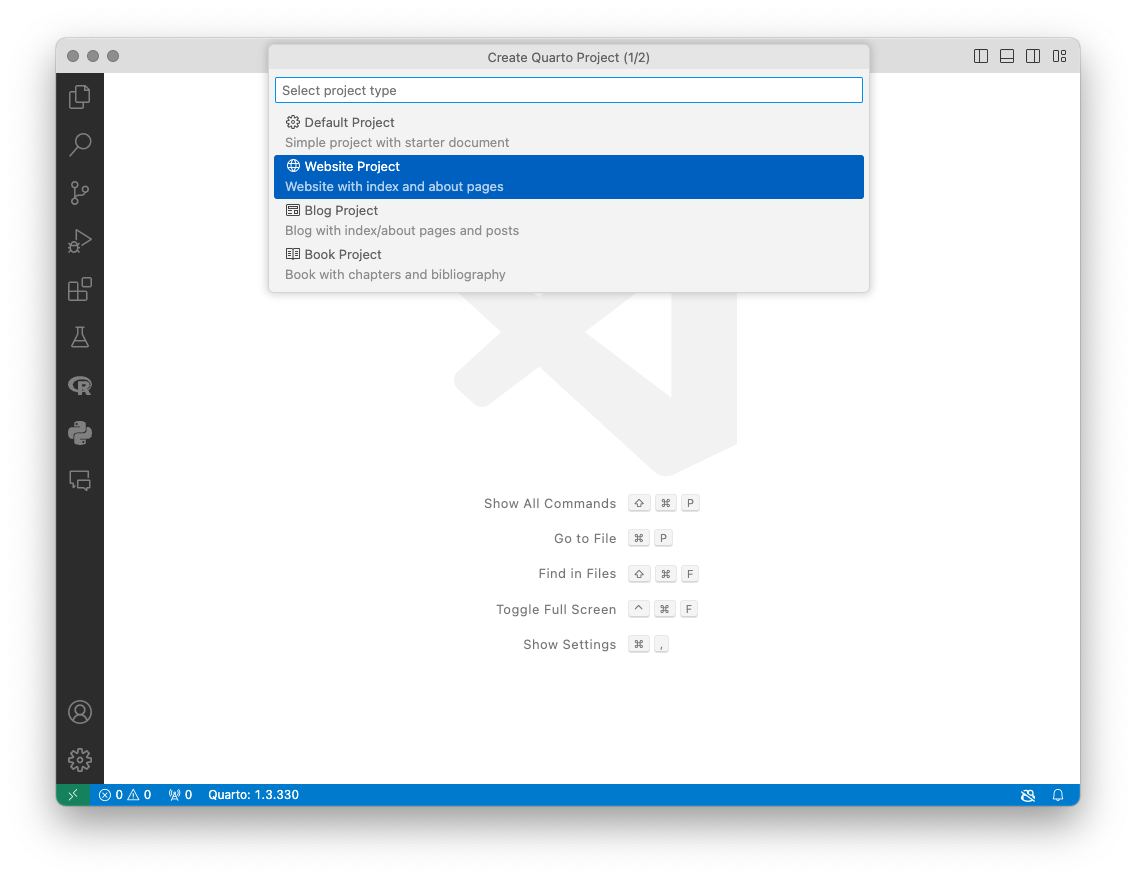
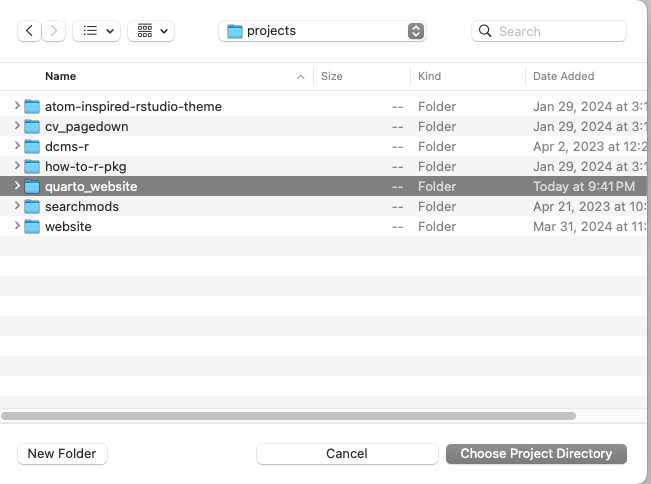
In RStudio, create a new project by selecting “New Project” from the File menu or by using the dropdown at the top-right of RStudio. Choose “New Directory” and then “Quarto Website.” Enter a name for the directory that will hold the website files (I use quarto_website in this tutorial) and where you’ll store that directory on your computer. Unless you know what you’re doing, I recommend for now that you uncheck the Git, renv, and Visual Editor options –- you can enable those later if you wish. Finally, click “Create Project”.

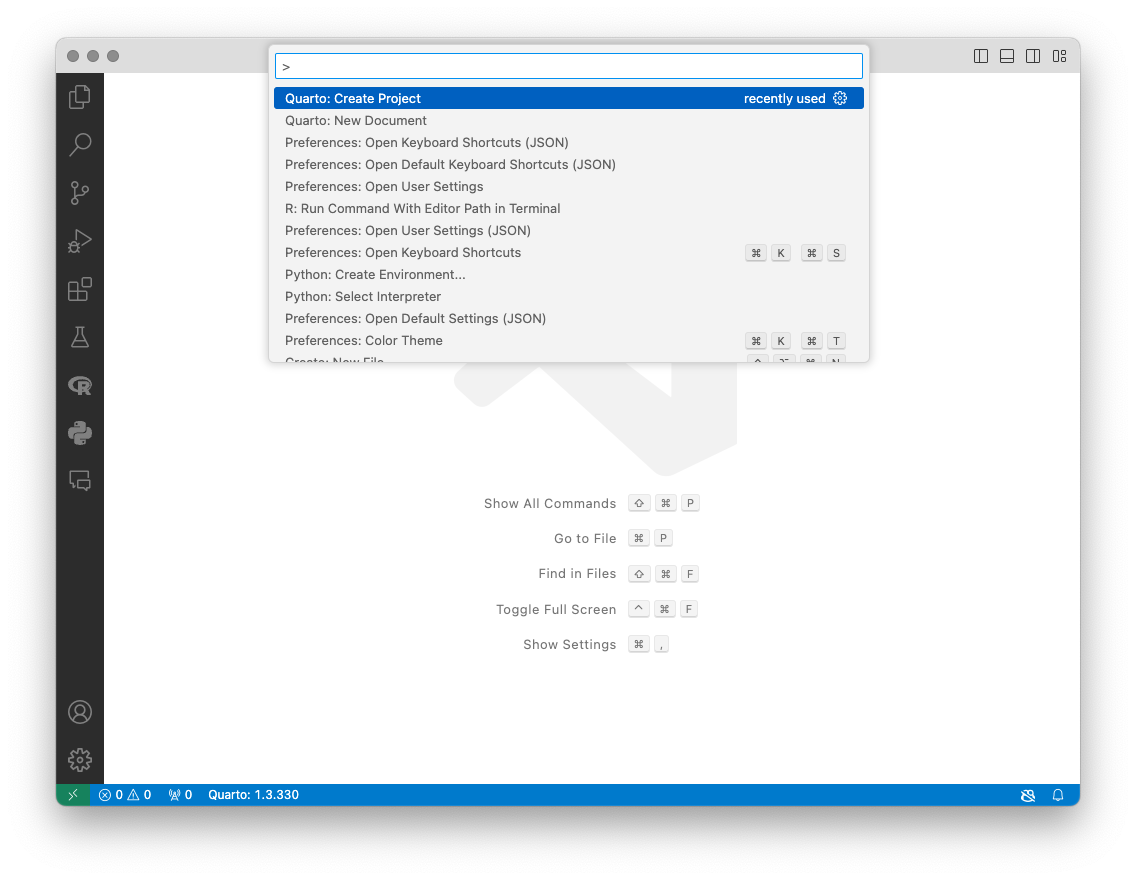
In VS Code, search the Command Pallet (Ctrl+Shift+PCtrl+Shift+P on Windows or Cmd+Shift+PCmd+Shift+P on Mac) for “Quarto: Create Project”. Select “Website Project.” Then select the directory that will hold the website files and enter a name for the project directory.
If you’re not using RStudio or VS Code, you can simply create the text files that are discussed next.
Step 3: Inspect the Template
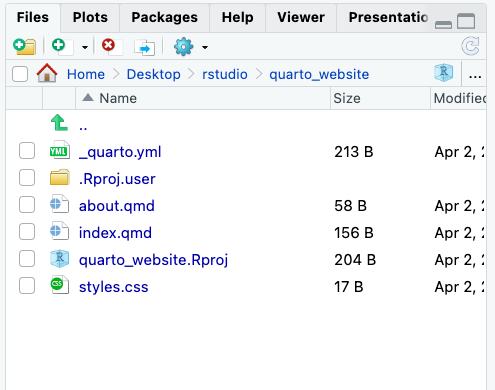
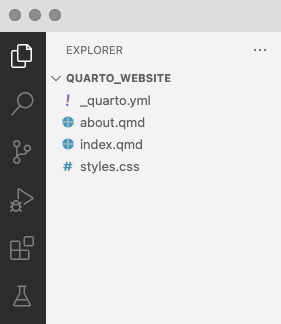
The template directory contains two important files: a _quarto.yml configuration file, and the index.qmd Quarto file with the contents of the landing page.
There is also a placeholder for a second website page (the about.qmd Quarto file) and an empty styles.css file. Depending on your IDE, you may also have RStudio-related or VS Code-related files or folders.
The _quarto.yml configuration file specifies (1) that the rendered documents should combine to form a website, (2) contents of the navigation bar that enables users to move around your website, and (3) the theme and style used to visually enhance the website.
_quarto.yml
project:
type: website
website:
title: "quarto_website"
navbar:
left:
- href: index.qmd
text: Home
- href: about.qmd
format:
html:
theme: cosmo
css: styles.css
toc: true- 1
- Identify the project as a website.
- 2
- Specify links in the Navigation Bar
- 3
- Control the website’s visual theme/style
The index.qmd file contains a bare minimum template with the document properties controlled by the YAML header sandwiched between triple dashes at the top, followed by the document content below.
index.qmd
---
title: "quarto_website"
---
This is a Quarto website.- 1
- YAML header
- 2
- Document content
Step 4: Prepare for GitHub
Later, we will host our website on GitHub. It can be helpful to set two properties now.
First, change the name of the output directory that will hold the rendered html files to “docs” by adding line 3 below to the _quarto.yml configuration file:
_quarto.yml
project:
  type: website
  output-dir: docs  # <-- add this
Next, add an empty text file titled “.nojekyll” in the project directory. For example, at the command line you could run:
Terminal
touch .nojekyllStep 5: Render the Template
Before we make any customizations other than those in Step 4, let’s ensure we can render the “source” files that we have been working with into html output files.
In Rstudio, click the “Render Website” button on the Build tab. In VS Code, click the “preview” button at the top-right of any .qmd file. Or from the Terminal, use cd to navigate inside of the website directory and run quarto preview. The rendered website should appear in RStudio’s Viewer tab, a new VS Code tab titled “Quarto Preview,” or as a new tab in your default browser.
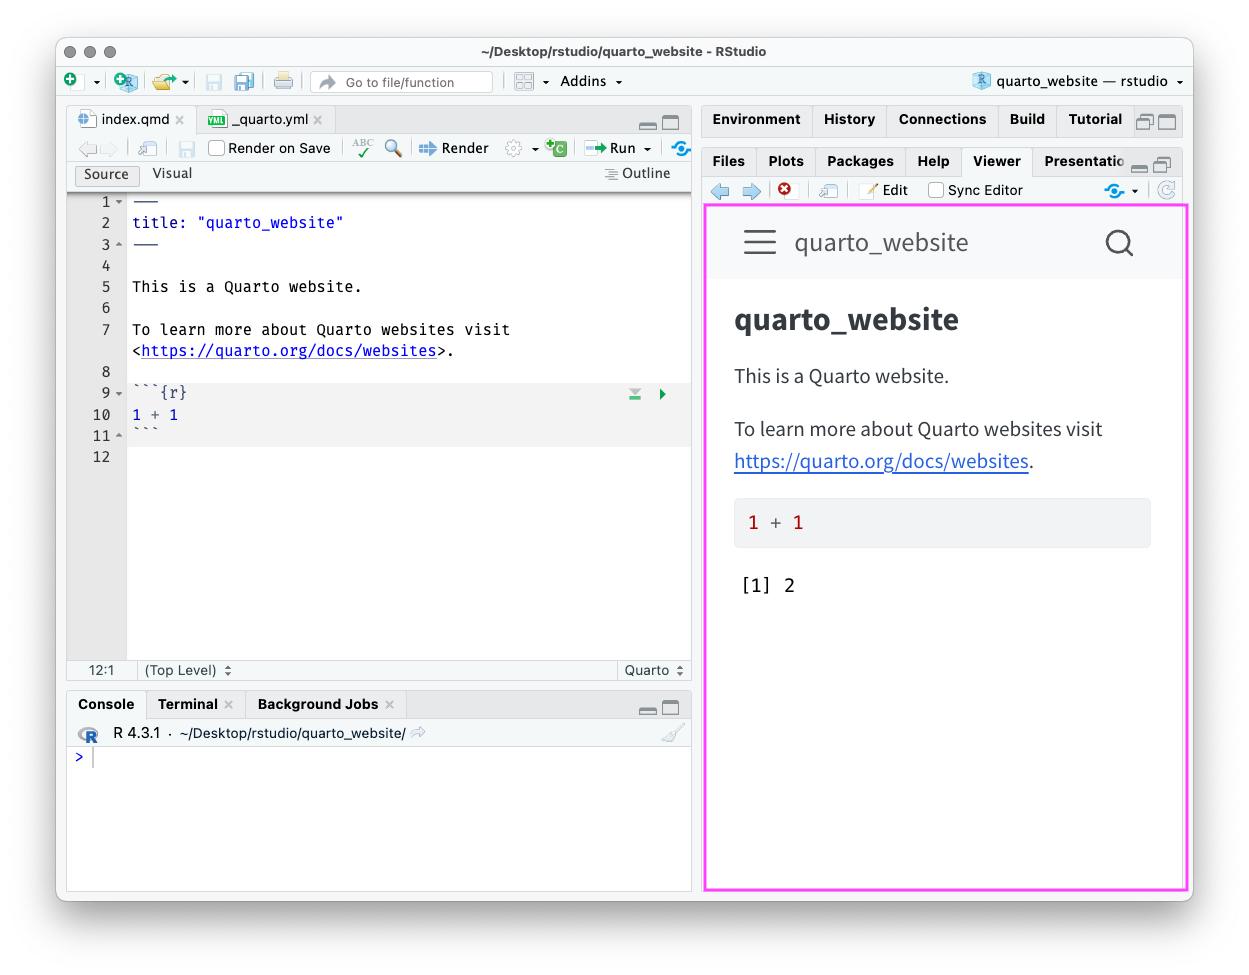
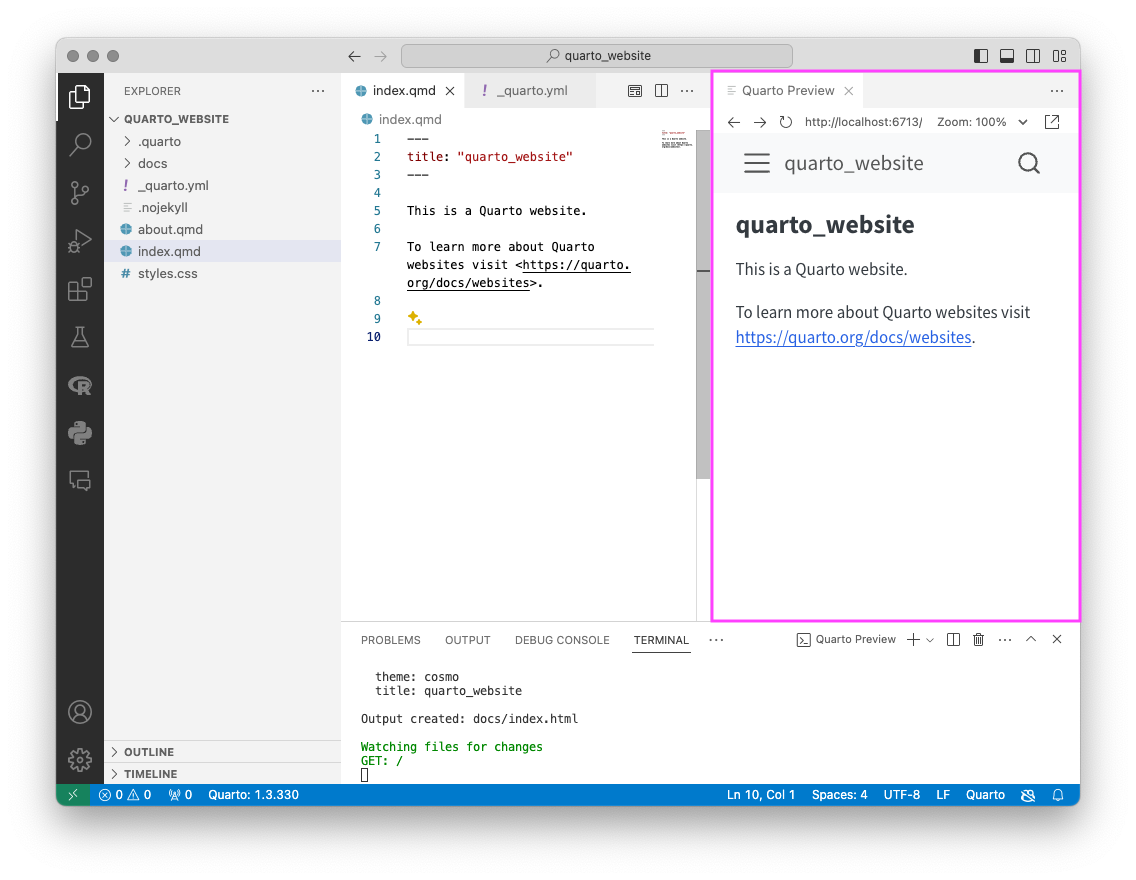
The rendered website should have a navigation bar at the top, with the website title and links controlled by the content in the _quarto.yml configuration file. The information on the landing page is populated from the content of the index.qmd file and similarly the information on the About page is populated from the content of the about.qmd file.
Step 6: Customize the Home Page
I have elected to have the landing page of the website be an “about me” page. So to avoid confusion, delete the existing “about.qmd” file and the corresponding navbar entry in the _quarto.yml configuration file:
You should also rename the website title, which shows up in the navbar and you can optionally change the navbar text for the landing page from “Home” to “About” to further reflect that the landing page will be an “about me” page.
_quarto.yml
website:
title: "quarto_website" # <-- change this
navbar:
left:
- href: index.qmd
text: Home # <-- optionally change this to "About"
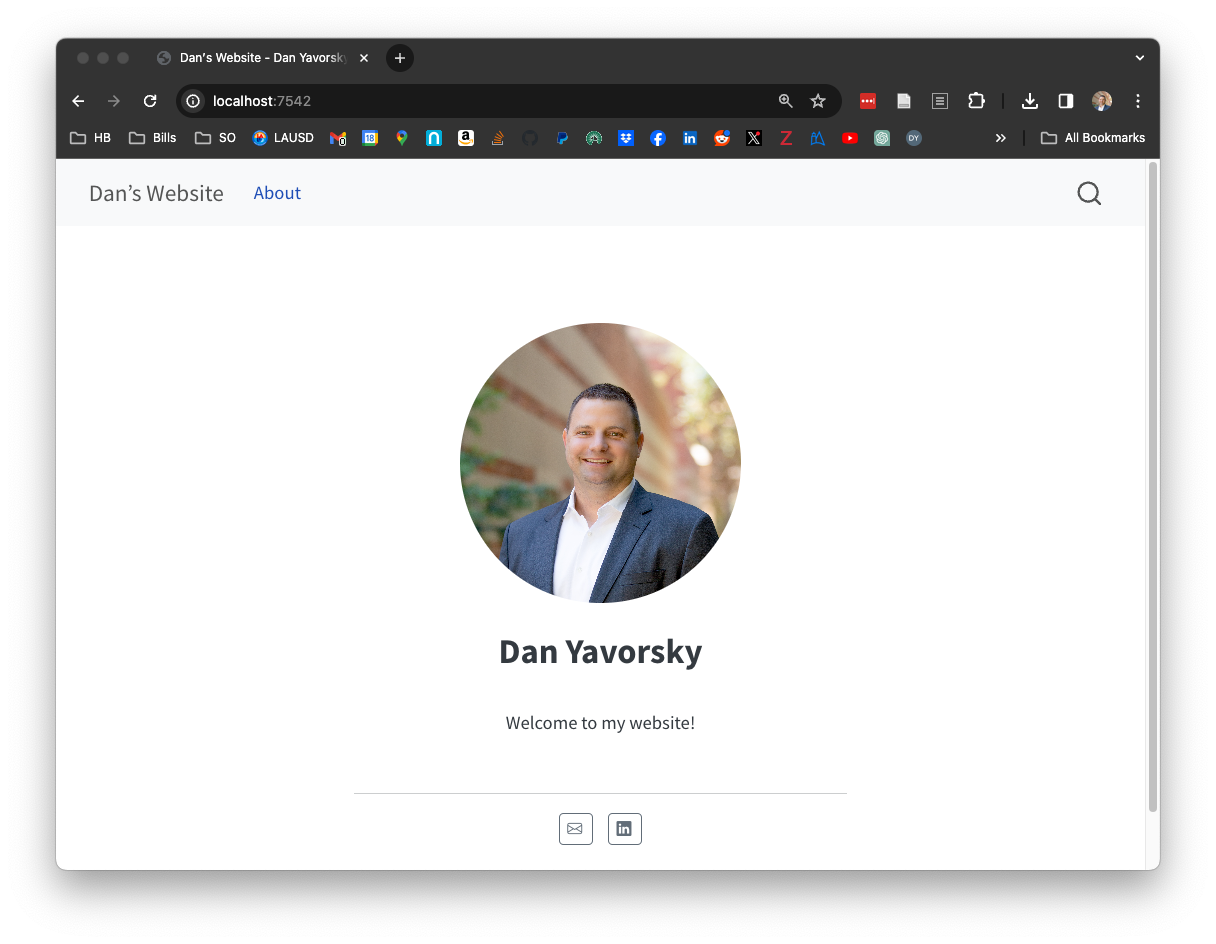
- href: about.qmd # <-- delete this lineQuarto has two special page types – about pages and blog listing pages – and we’ll use both in this tutorial. To make the landing page of the website into an “about me” page, change index.qmd to the following:
index.qmd
---
title: "Your Name"
image: "files/profile_pic.jpg"
about:
template: jolla
links:
- icon: envelope
href: mailto:your_email@address.com
- icon: linkedin
href: https://www.linkedin.com/in/your_username
---
Welcome to my website!- 1
- add an image
- 2
- use an “about page” template
- 3
- create buttons with Bootstrap5 icons
- 4
- add some information
- We’ve specified that we would like to include an image from the profile_pic.jpg file in the files sub-directory. You’ll need to create that sub-directory inside of your website directory and add a file with a photo. To do this at the terminal, you can use
mkdirto create a directory andcpto copy.
Terminal
pwd # confirm you are in your 'quarto_website' directory
mkdir files
cp path/to/profile_pic.jpg files/profile_pic.jpg
We’ve also requested the jolla template. There are 5 built-in templates; a preview of each is available in the Quarto documentation.
We’ve also added buttons that link to our email and LinkedIn profile. You can add addition buttons decorated with any of the Bootstrap 5 icons.
Finally, outside of the YAML document header, we started to add some text. Here, you can expand the content with additional information, images, or any of Quarto’s document authoring options.
At this point, re-render your website to check out your customized “about you” landing page.
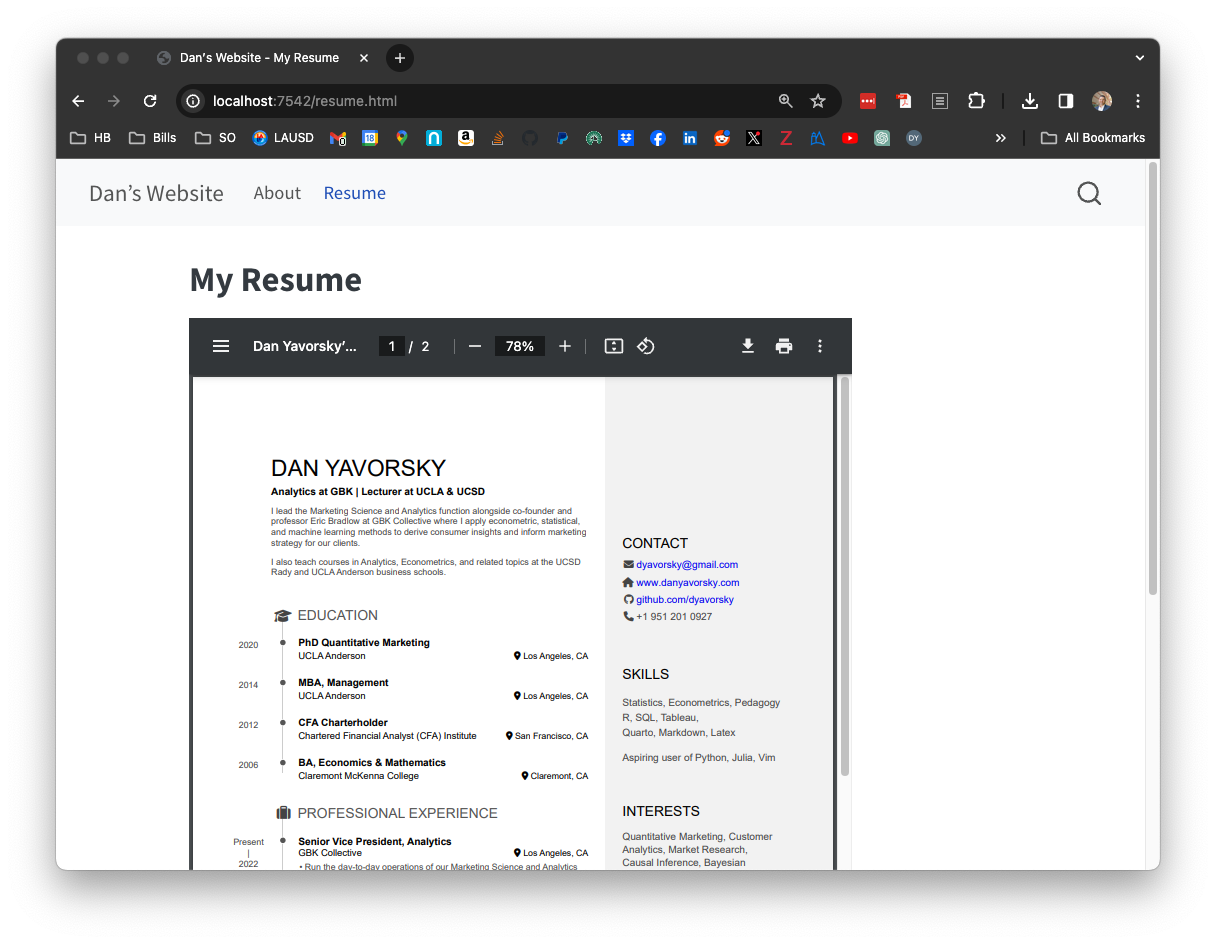
Step 7: Add a Resume
Create a new Quarto document at the top-level of your website directory (where the about.qmd file used to live). We’ll call this one resume.qmd.
Add a PDF file of your resume to your files sub-directory.
Terminal
cp path/to/resume.pdf files/resume.pdfNext, at the command line in the Terminal (not the R console), install a handy Quarto extension for embedding PDFs in HTML files from user jmgirard by running the following command. Hit enter or otherwise indicate “y” when prompted twice, first about trusting the author and then about implementing changes.
Terminal
quarto add jmgirard/embedpdfNext, add content to the resume.qmd file we created a moment ago. This should include the embed syntax {{< pdf path/to/resume.pdf >}}. I have found the displayed height and width options to work well.
resume.qmd
---
title: "My Resume"
---

{{< pdf files/resume.pdf width=100% height=800 >}}
Lastly in the step, add a link to the navbar so visitors to your website can navigate to the Resume page:
_quarto.yml
website:
  title: "quarto_website"
  navbar:
    left:
      - href: index.qmd
        text: About
      - href: resume.qmd  # <-- add this
        text: Resume      # <-- add this
Render yet again, possibly with Ctrl+Shift+KCtrl+Shift+K or Cmd+Shift+KCmd+Shift+K since memorizing these shortcuts is quite helpful given how often we re-render.
Step 8: Add a Blog
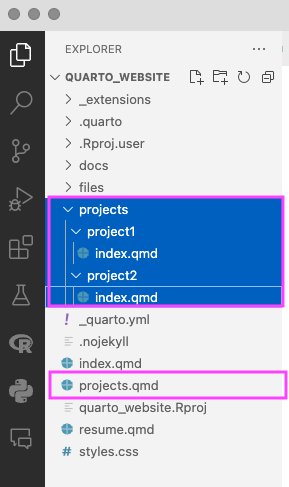
Create a Quarto file at the top-level of the website directory alongside index.qmd and resume.qmd. I’ll call mine projects.qmd. Create a sub-directory to hold the contents of the blog. I’ll call mine projects. In that sub-directory, make sub-sub-directories for each blog post. I call mine project1 and project2. Finally, in those sub-sub-directories, add index.qmd files.
Terminal
touch projects.qmd
mkdir projects

mkdir projects/project1
mkdir projects/project2

touch projects/project1/index.qmd
touch projects/project2/index.qmd
In projects.qmd, we want to specify that we’re making a blog. Quarto calls this a “listing” page. Fill out the Quarto file with at least the following:
projects.qmd
---
title: "My Projects"
listing:
  contents: projects  # <-- the sub-directory with blog content
  type: grid          # <-- my preferred layout type
---
And as always, add a link to the navbar so visitors to your website can navigate to your blog / project portfolio:
_quarto.yml
website:
  title: "quarto_website"
  navbar:
    left:
      - href: index.qmd
        text: About
      - href: resume.qmd
        text: Resume
      - href: projects.qmd  # <-- add this
        text: Projects      # <-- add this
You can render now and have both projects / blog posts entirely empty. Or, just to demonstrate what happens when we add a bit of content, add the following to the project1 index.qmd file and then render.
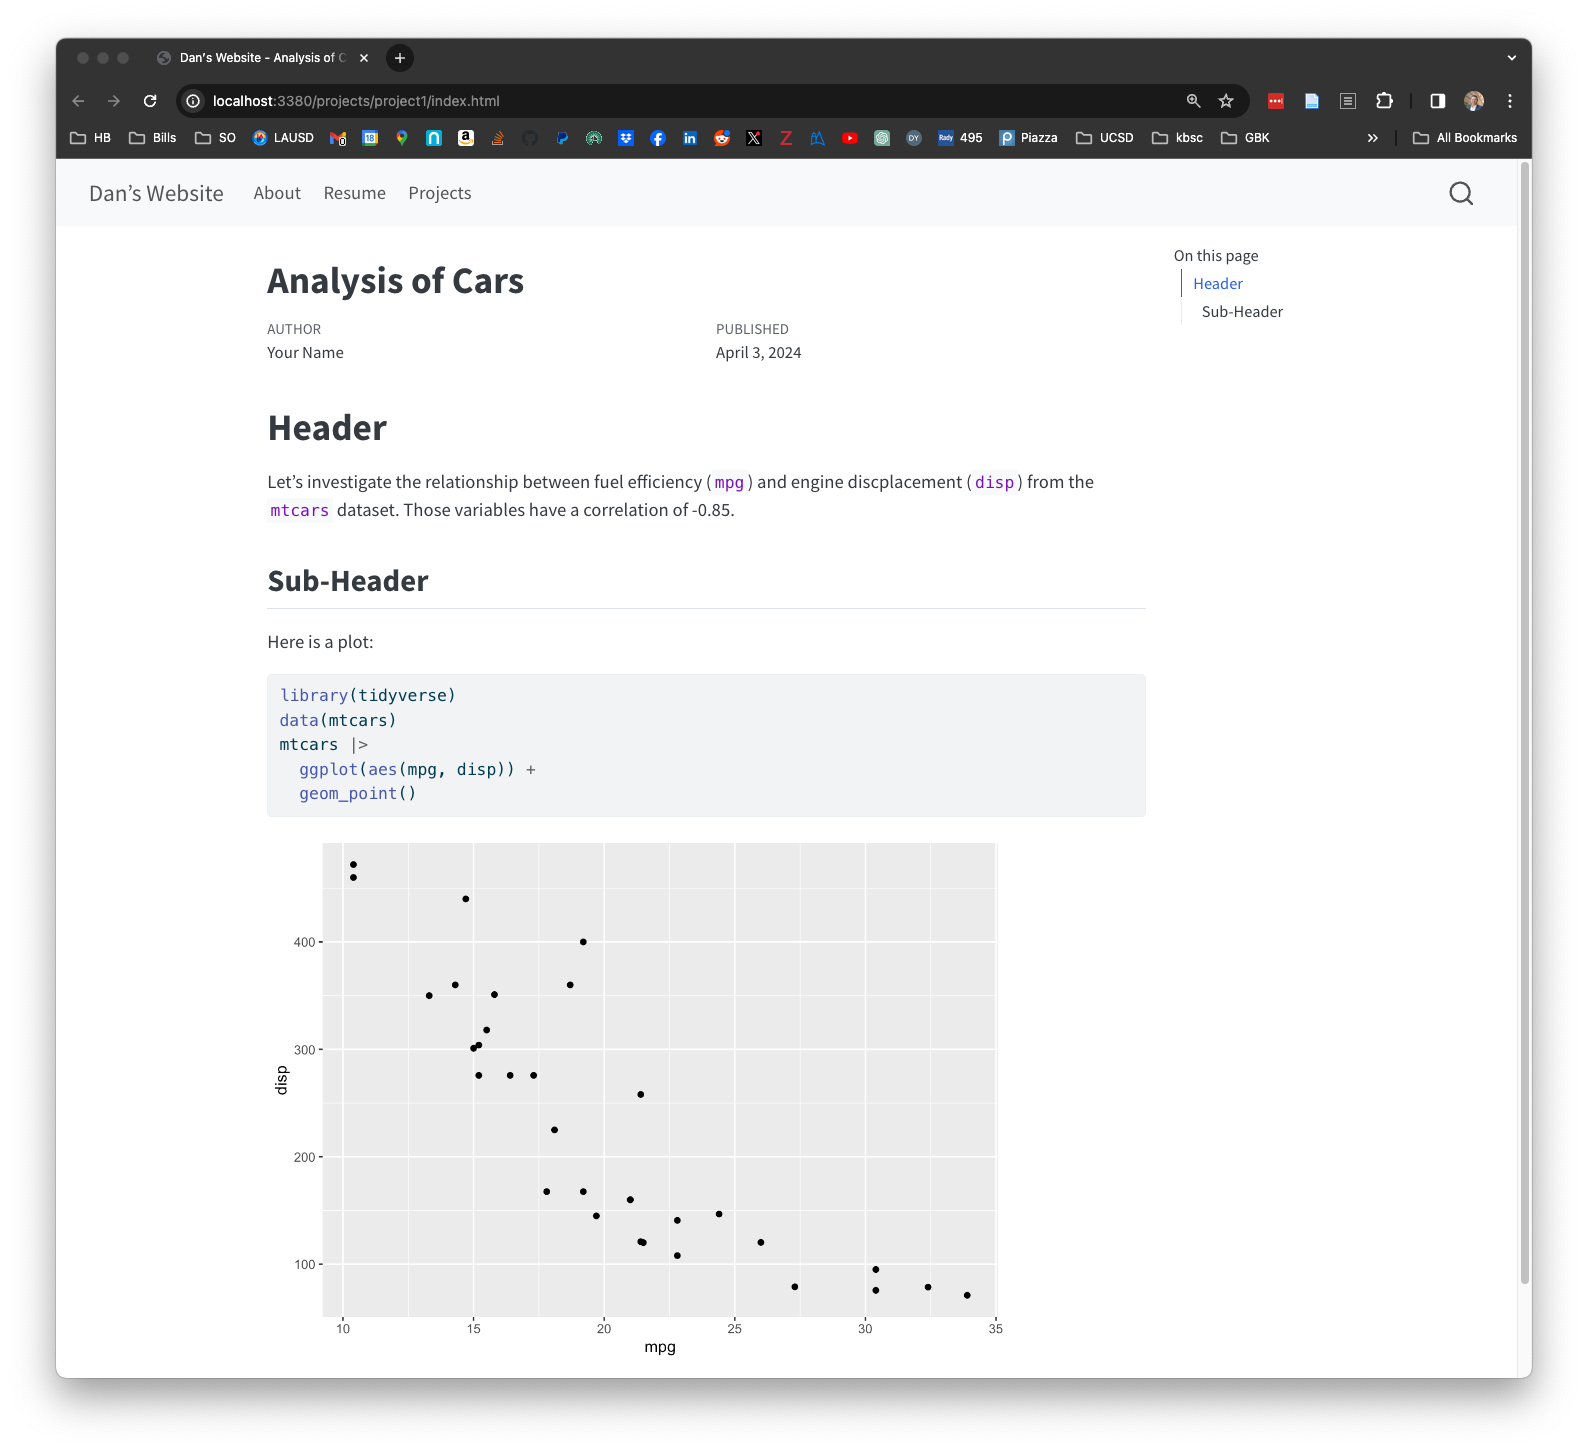
index.qmd
---
title: "Analysis of Cars"
author: Your Name
date: today
---
# Header
Let's investigate the relationship between fuel efficiency (`mpg`) and engine displacement (`disp`) from the `mtcars` dataset. Those variables have a correlation of `r cor(mtcars$mpg, mtcars$disp) |> format(digits=2)`.
## Sub-Header
Here is a plot:
```{r}
#| message: false
library(tidyverse)
data(mtcars)
mtcars |>
ggplot(aes(mpg, disp)) +
geom_point(color="dodgerblue4", size=2)
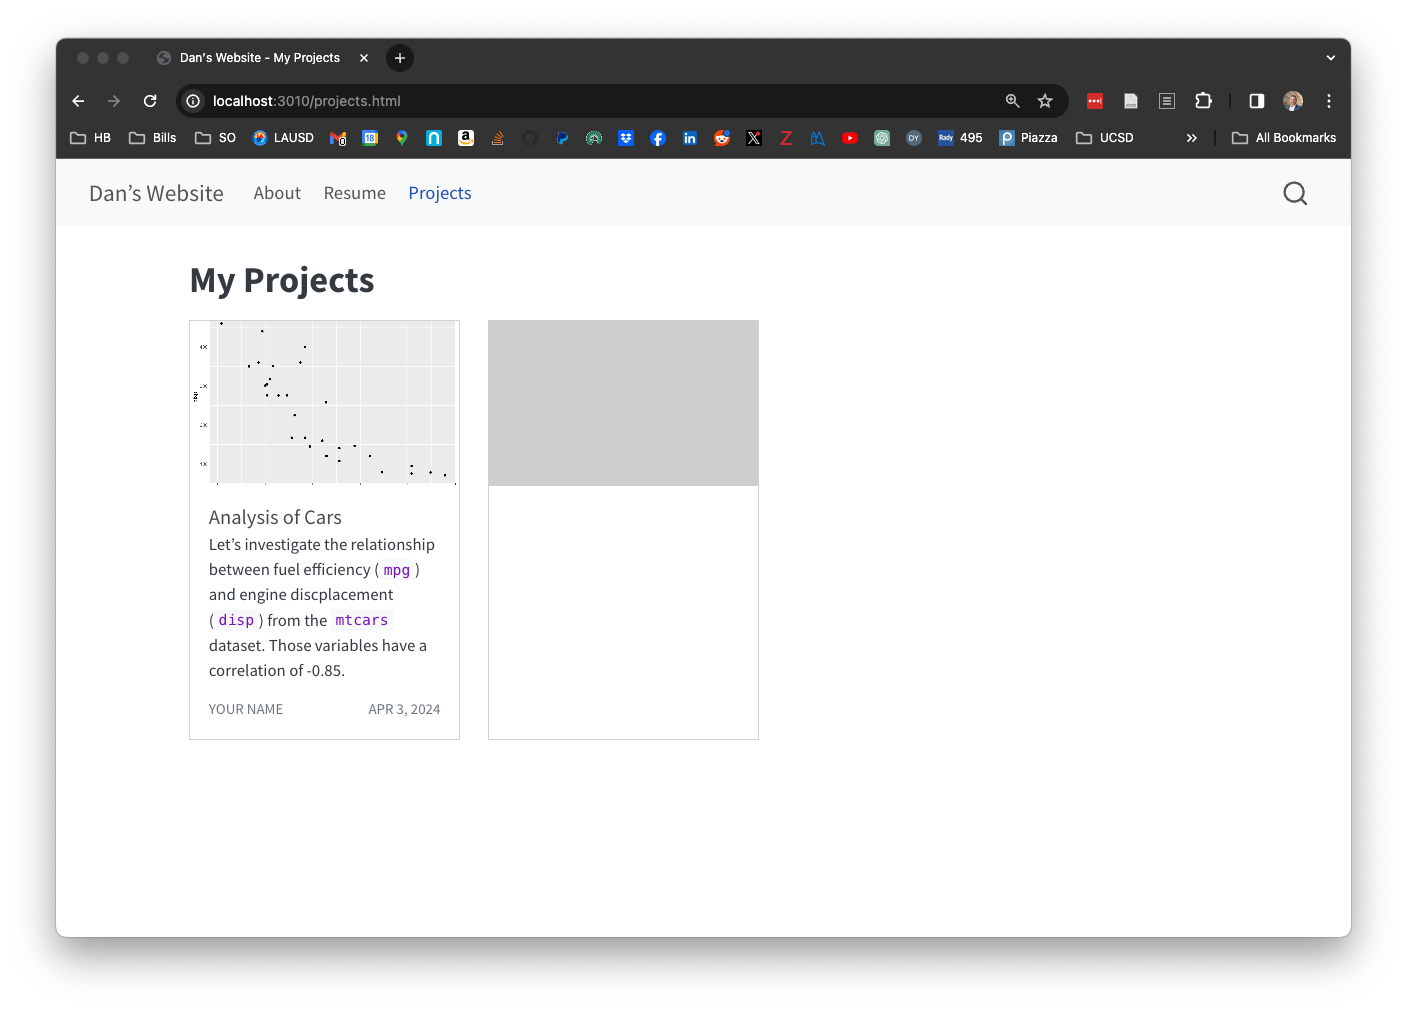
```The “listing” page for the blog shows links to the individual blog posts in a grid layout.
The posts themselves contain headers, text, code, and output from the code including a plot.
Step 9: Grab a Beverage
If you made it this far, you have a website skeleton. Now spend some time personalizing it and adding your projects, blog posts, or whatever else. Like many hobbies, working on a website can be fun and addictive. Check out the next section for additional inspiration.
If you’re ready to host your website on GitHub for the world to see, follow the steps here.
Additional Resources
To learn more, definitely check out quarto.org’s resources for making websites: https://quarto.org/docs/websites/
Posit’s four-part YouTube tutorial on Quarto Websites is another valuable resource: part 1, part 2, part 3, part 4.
Additionally, there are several other excellent tutorials on developing Quarto websites and blogs:
\[ \hspace{1em} \]
Finally, if you see something you like on someone else’s website, you can usually visit their GitHub page to see how they did it!
In particular Andrew Heiss and Marvin Schmitt have fully-featured Quarto-based websites.
In addition, the following websites (listed alphabetically by first name) offer inspiration too: Albert Rapp, Beatriz Milz, Chris Kenny, Ella Kaye, Emil Hvitfeldt, Meghan Hall, Mine Dogucu, Sam Csik, and Tom Mock.
Mine is here.